This screen allows the user to create Barns containing stalls, tack rooms, wash rooms, etc.
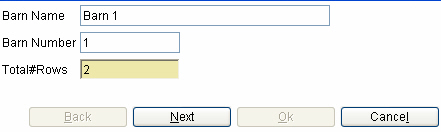
Select "New Barn" and the following screen will open.
Barn Name – Type in Barn name and/or number.
Barn Number – Type in Barn number.
Total # Rows – Put in the total number of rows in the barn.
Select "Next" to continue, a second screen will open.
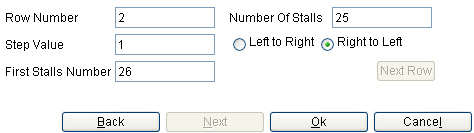
Row Number – Place the row number you wish to start with.
Number of Stalls – Place the total number of stalls in that row.
Step Value – This number will determine how the stall numbers will be assigned. Example if the number is (1) the stall numbers will be consecutive (1,2,3,4,5 etc.). If the number is (2) the stall numbers will be odd or even, such as, (1,3,5,7,etc.).
Left to right or Right to Left - The user will select one of the radio buttons and the stall numbers will run from left to right or right to left depending on which button is selected.
First Stalls Number – Place the number you wish to start the row of stalls with.
Next Row – Select this to continue to the "Next Row" See example below.

Select "OK" after the user has finished putting in the information regarding the rows.
The following screen will appear.
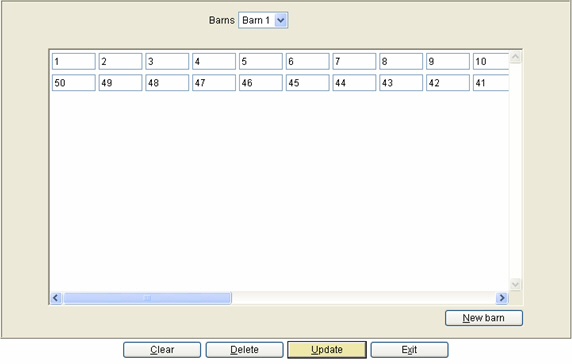
If the user would like to assign a stall something other than a number, such as, tack, ice, wash, open, feed etc., then double click on the stall number and a drop down box will appear. See example below:
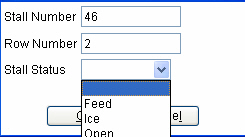
Select the option desired and hit "OK".
Once the barn has been created successfully, then hit "Update" and it will save the barn. The barn will now appear under the drop down menu next to "Barns". If the user would like to edit the barn after creating it, Then just select it from the drop down and double click on any stall to edit it. If the user would like to change the numbers on the stalls, then just click on the number, highlight it using the mouse and type in the new number or double click on the stall and change the number in the "Stall Number" box.
Clear – This will clear all the data on the screen.
Delete – Select a barn and hit the "Delete" button and it will delete the barn from the menu.
Update – Select "Update" once a barn has been completed and the user wants to save the information.
Exit – Select "Exit" to leave the screen and return to the main menu.